
Festive Gift Wrap Lettering

With Christmas rapidly approaching this year, why not have a go at lettering your own gift wrap? It’s not only a more cost effective, environmentally friendly option, but it’s also adds a ‘WOW’ factor for your friends and family unwrapping your gifts.
I lettered all of my gift wrap last year, and it turned out to be a fun activity after Christmas lunch, reading and guessing all the song lyrics from the wrap. Everybody loved it, I know that some of my family have kept it as it looked ‘too good to throw away’.
While it’s a wonderful project to take on, it can be quite time consuming too, hence I recommend starting early on and maybe focusing on wrapping smaller gifts. The bigger the sheet of paper the more words you’ll need to letter!
I want to make the process a little bit easier for you by sharing some of my favourite techniques, tools and hopefully inspiring you to have a go yourself, saving you a lot of trial and error testing different pens and supplies.
Did you know that by signing up to my Blooming Calligraphers membership you'll get instant access to the exclusive worksheet library, engaging calligraphy and watercolour projects, and fresh monthly content? Become a member today, sign up here
Let’s connect:
Instagram: http://instagram.com/creativefeeldesigns
E-mail: hello@creativefeeldesigns.com
www.creativefeeldesigns.com

Tools you’ll need:
✔️KRAFT PAPER
✔️ WHITE KRAFT PAPER
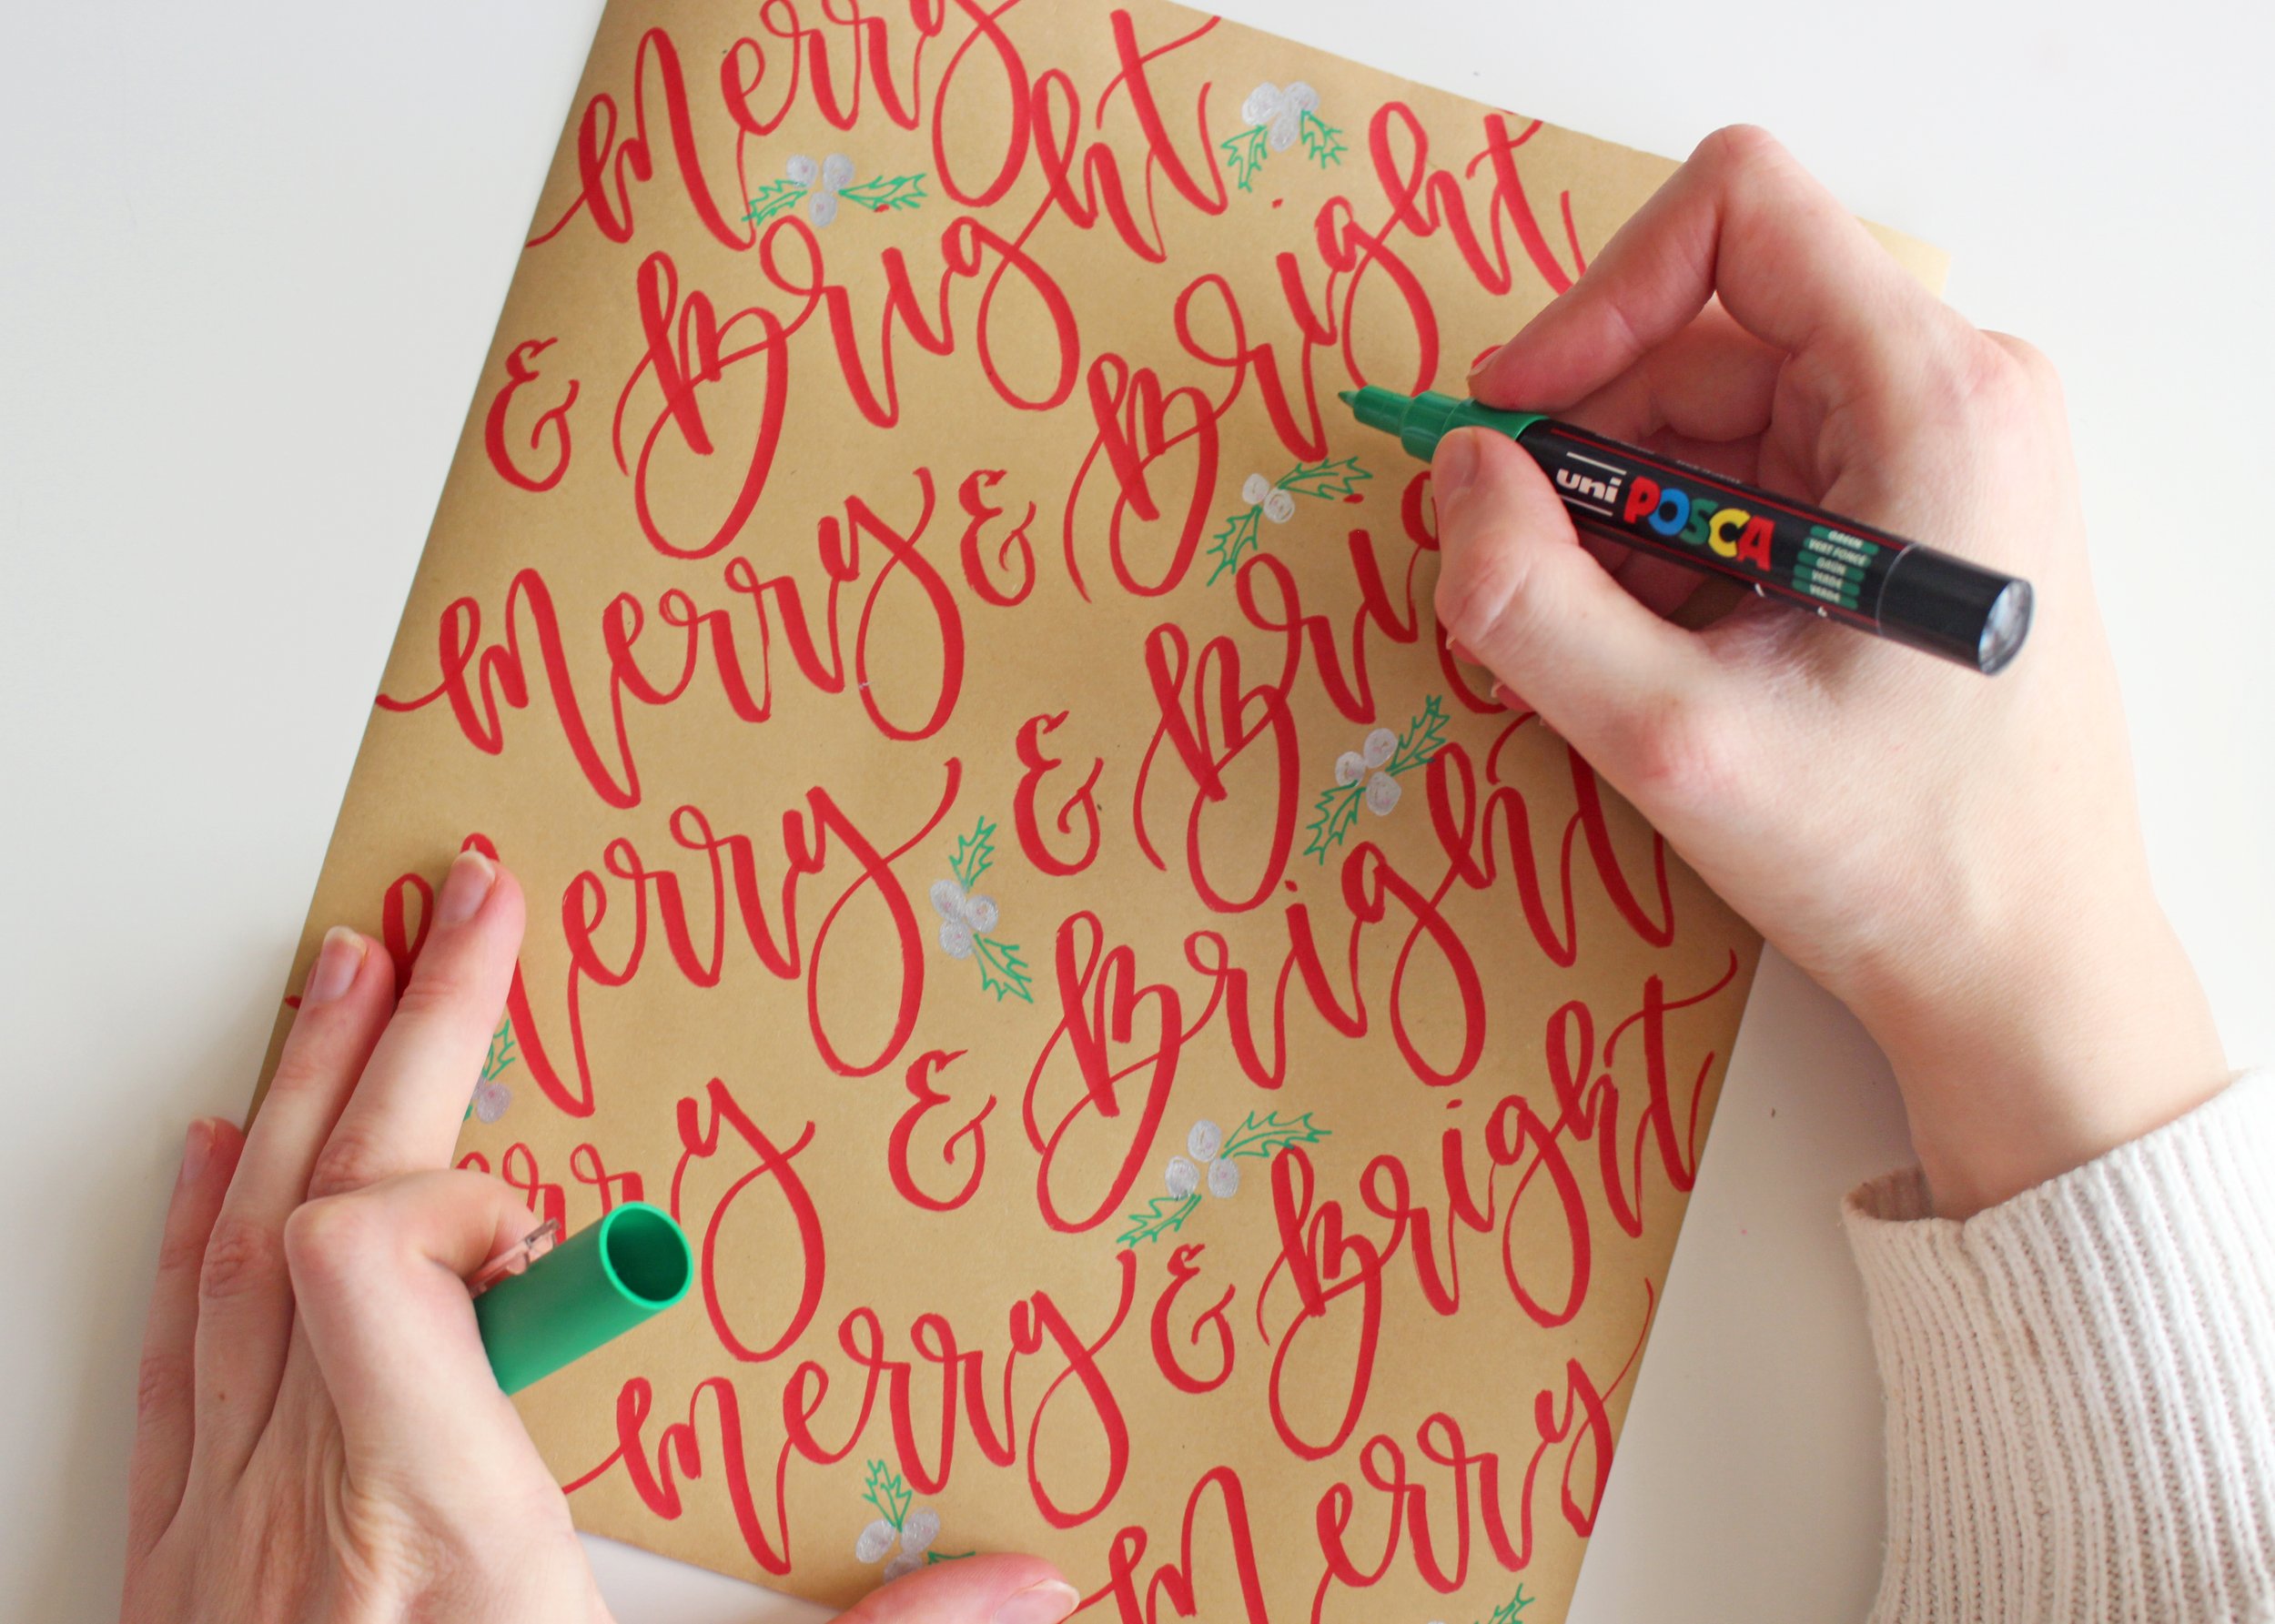
✔️Green Posca Pen
✔️Tombow Dual Brush Pens
✔️Metallic pens with a brush tip
✔️Acrylic Pens
✔️Twine
*** The links above may be affiliate links where appropriate. Which means that a purchase through these links may result in a few pennies of payments to me, to support creating further resources like this one! ***
Step 1 - Cut or trim the paper to the required size to fit your gift

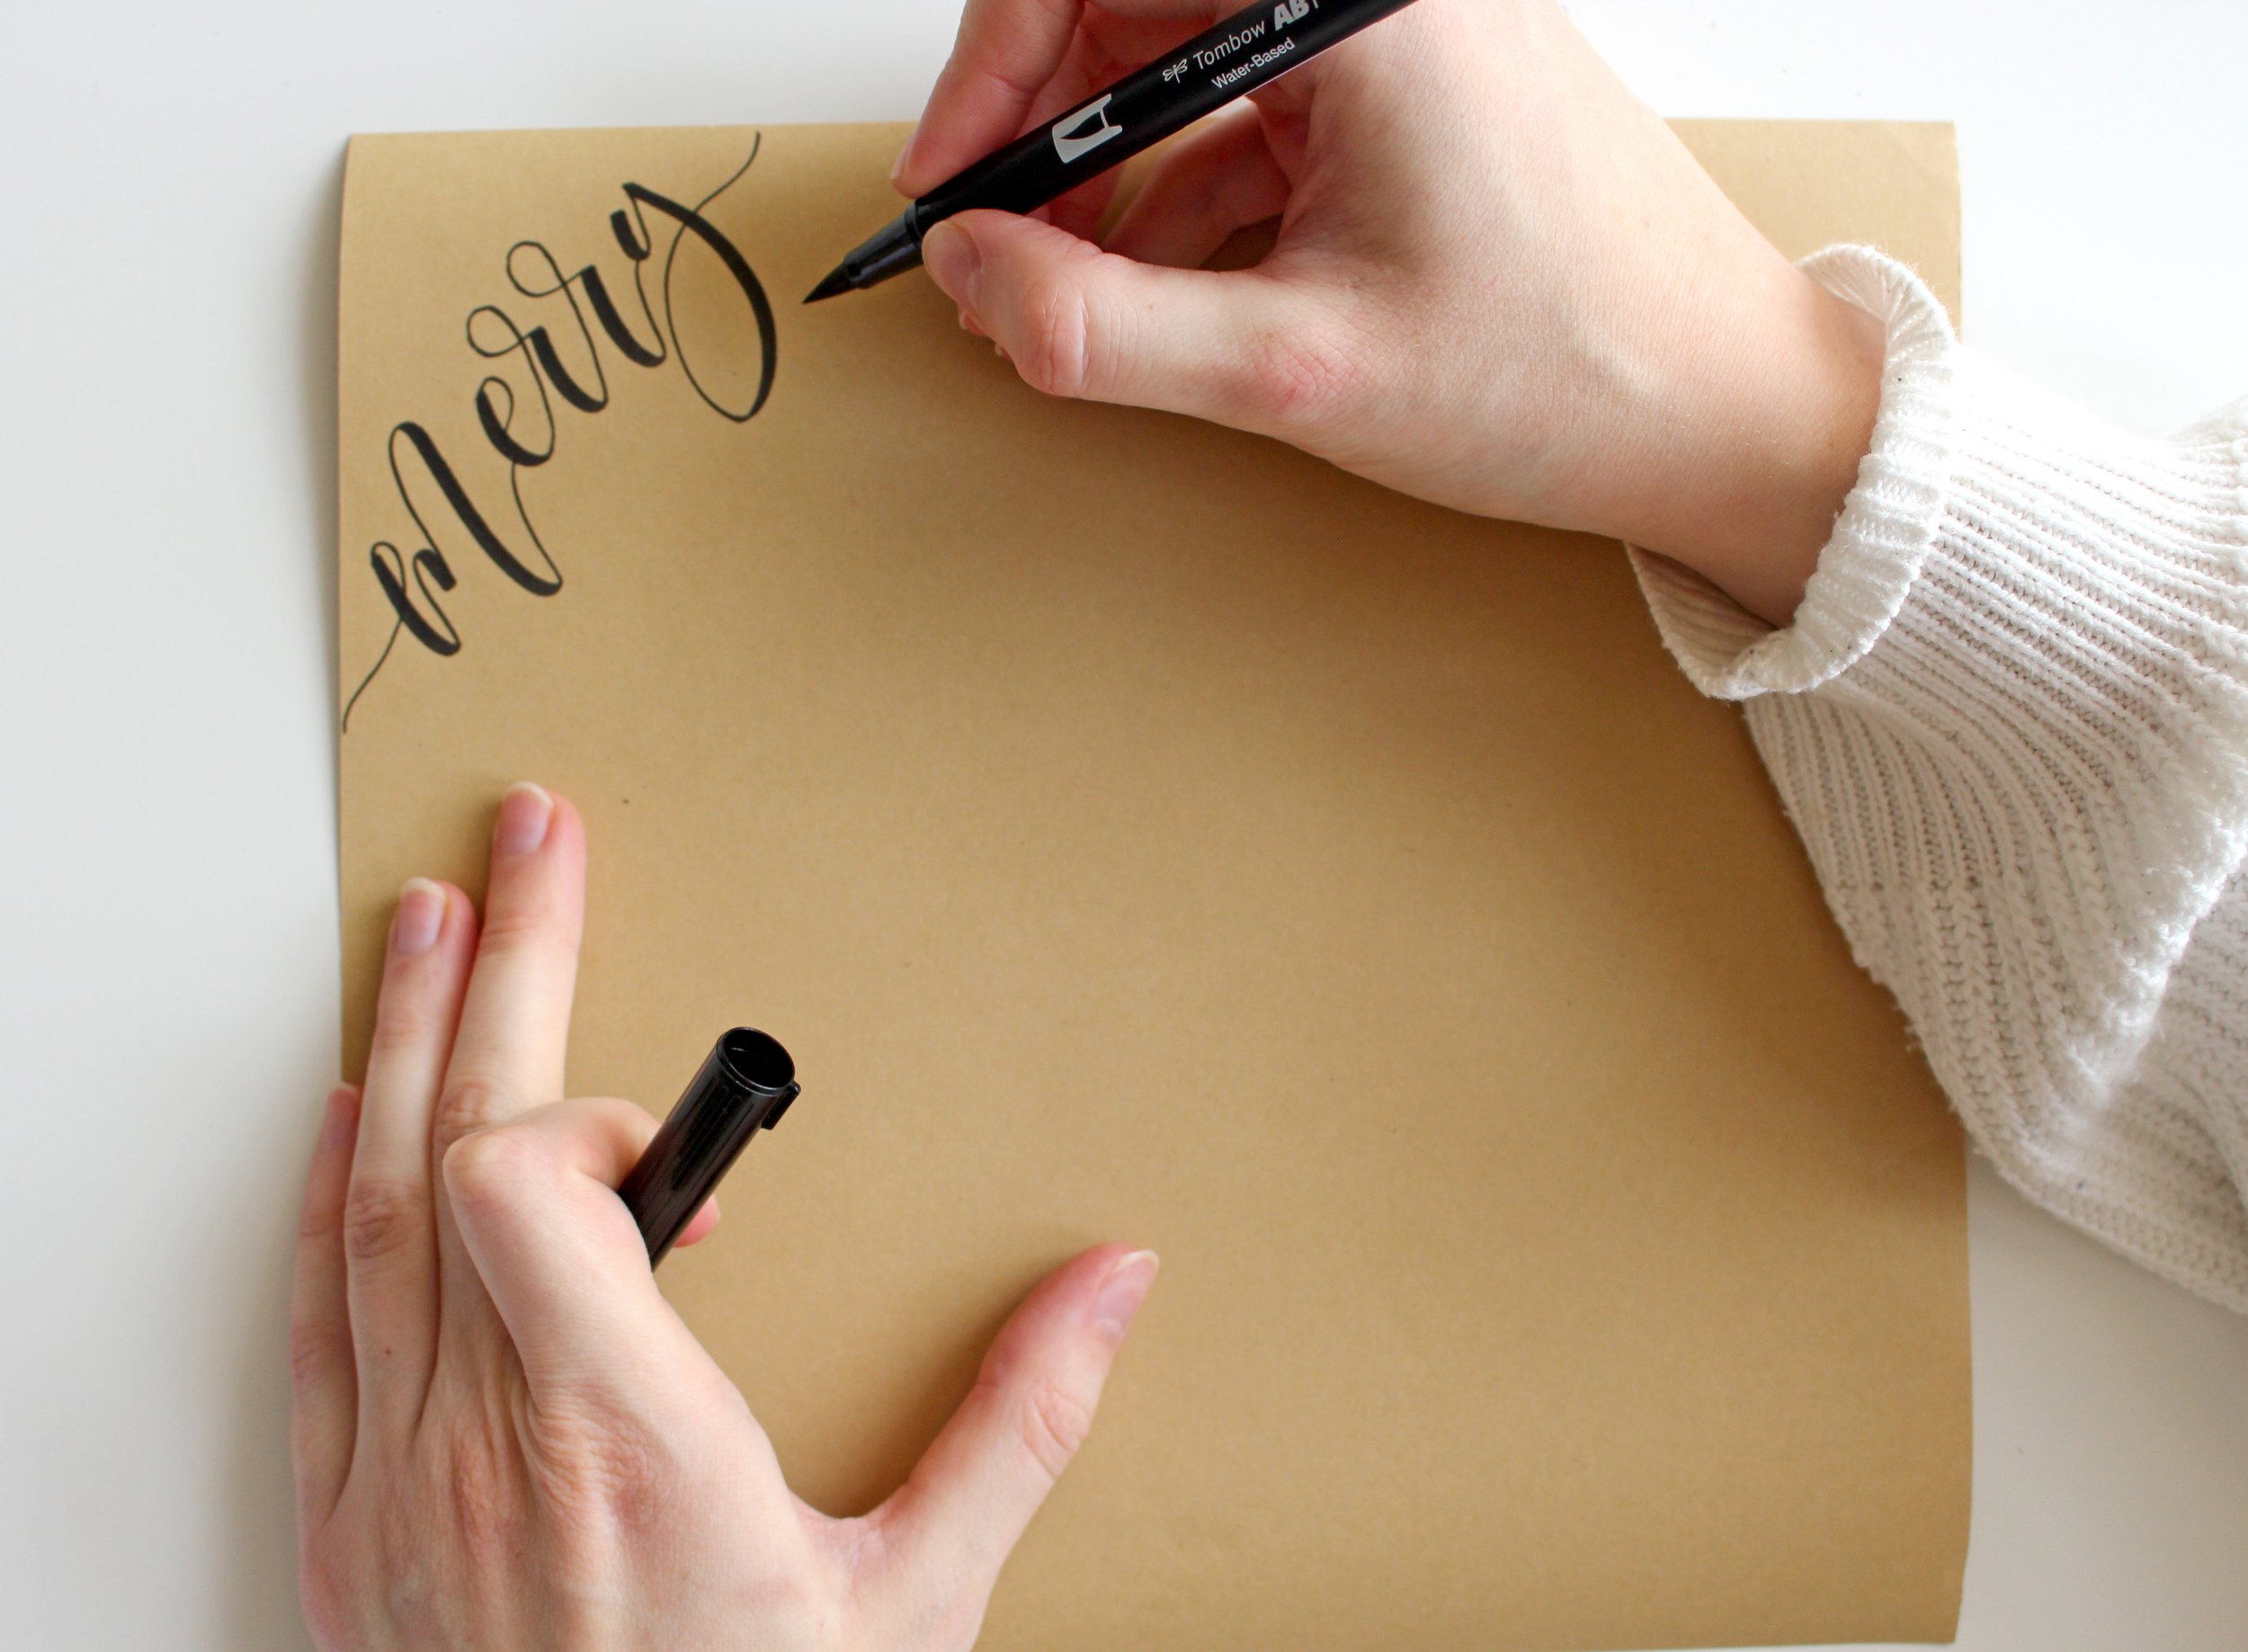
Step 2 - Start lettering the phrase of your choice diagonally, using a chunky brush pen such as a Tombow dual brush pen. Find the corner of the sheet and start your first word coming out of the left side and stretching all the way to the right. Use longer entry and exit strokes to stretch the word out if needed. Connecting your words to the edges of the paper will make the overall design more consistent.
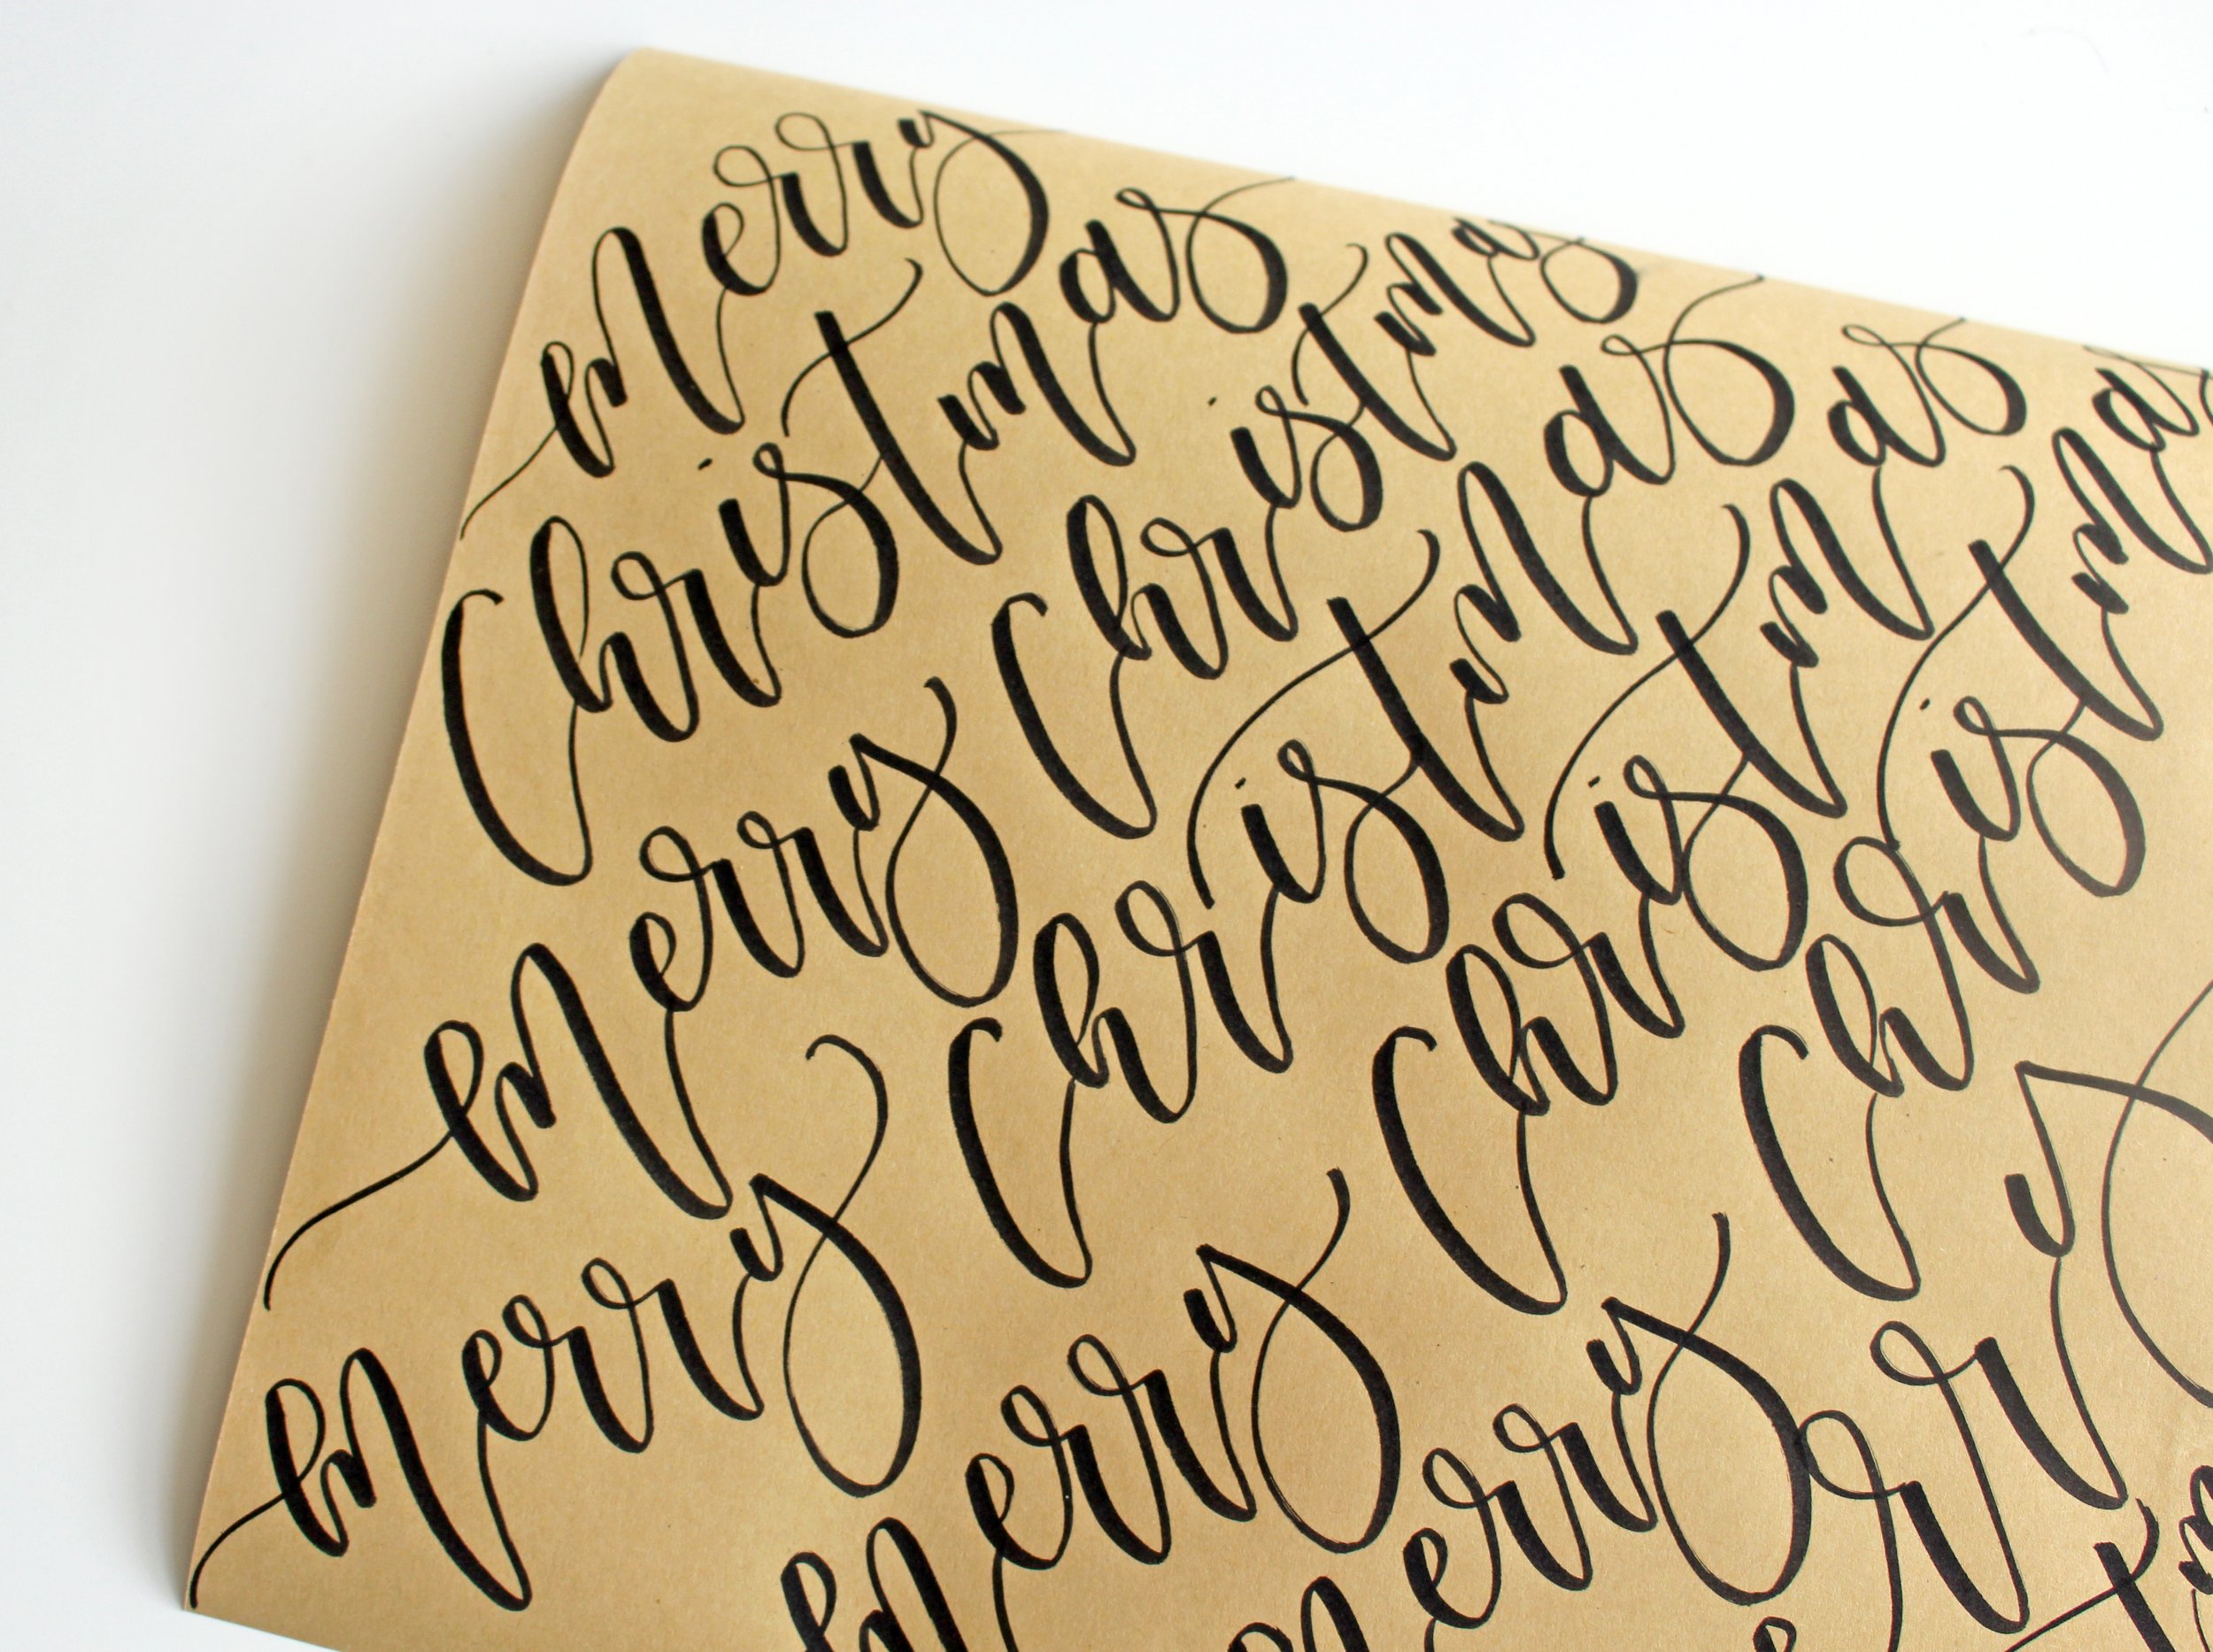
Step 3 - Keep lettering the same phrase over and over until you run out of room at the bottom. It can be tricky spacing it out towards the end, but remember that you can make the word smaller or bigger and increase or decrease spacing between letters to help you navigate the layout. Don’t worry if it’s not perfectly centred or laid out, it won’t be noticeable when wrapped around and it only adds more character.
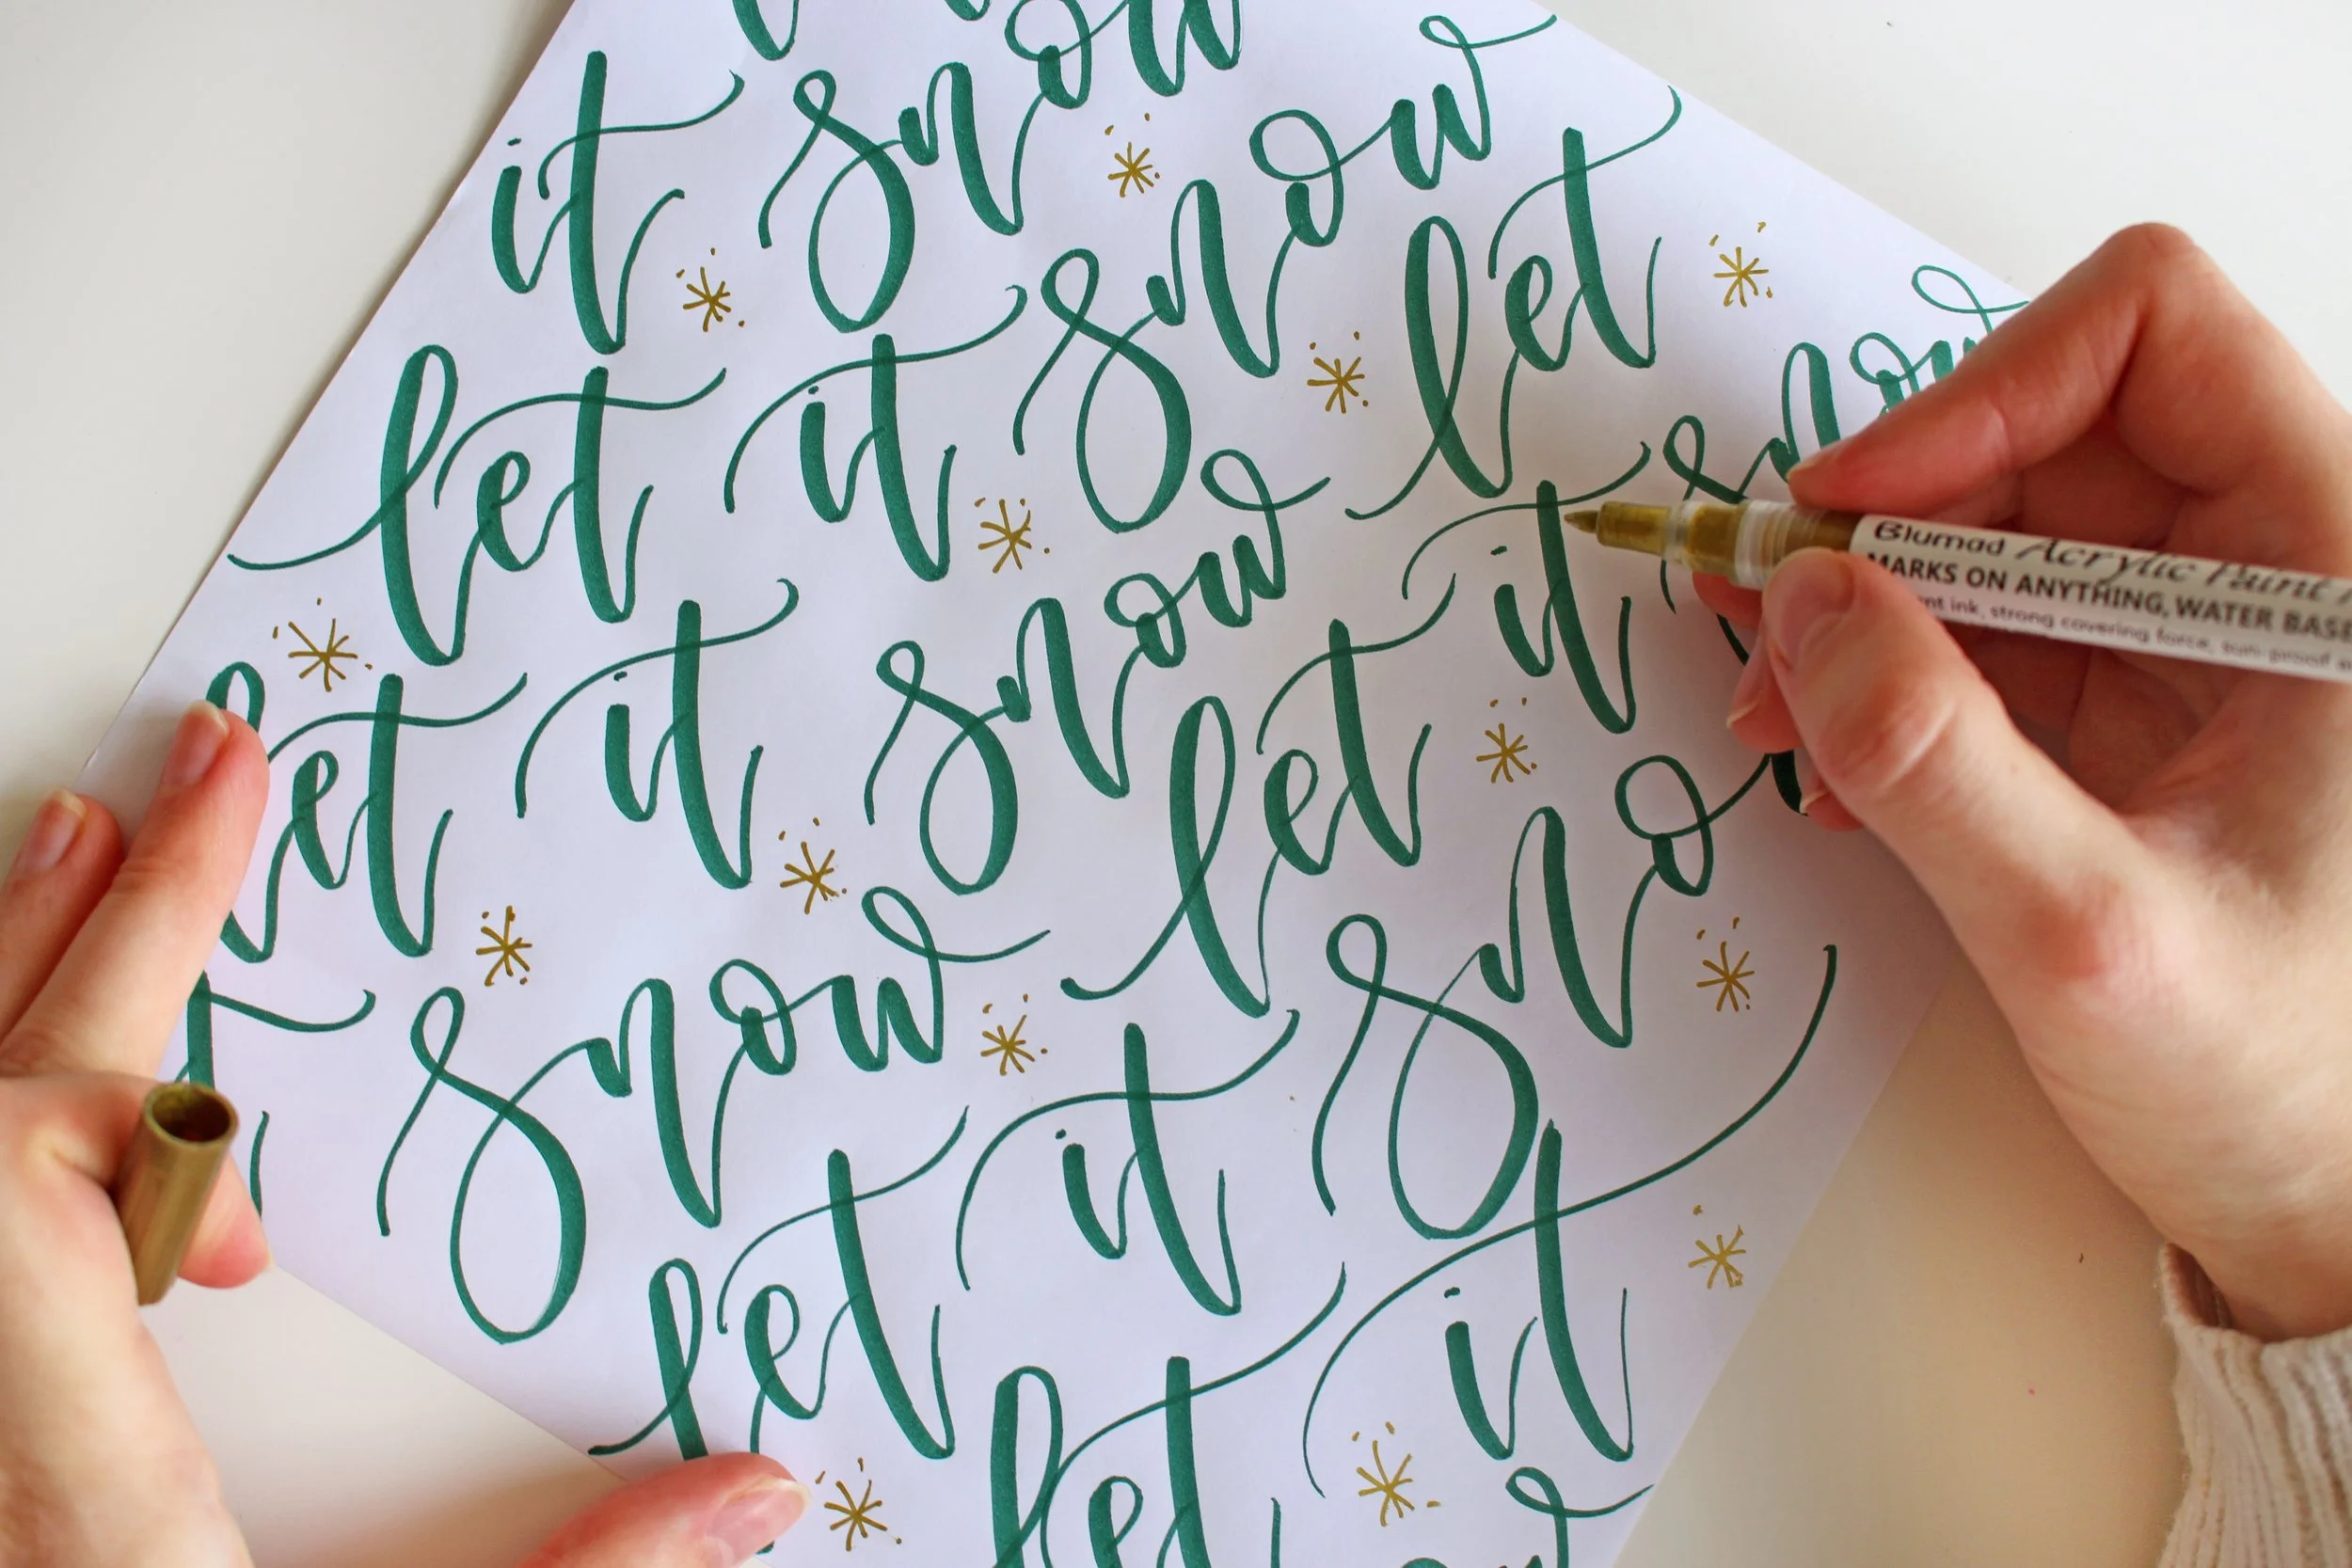
Some phrases you can try lettering - Merry Christmas, Let it Snow, Merry & Bright, Holly Jolly, Happy Holidays, All Is Calm All Is Bright etc.
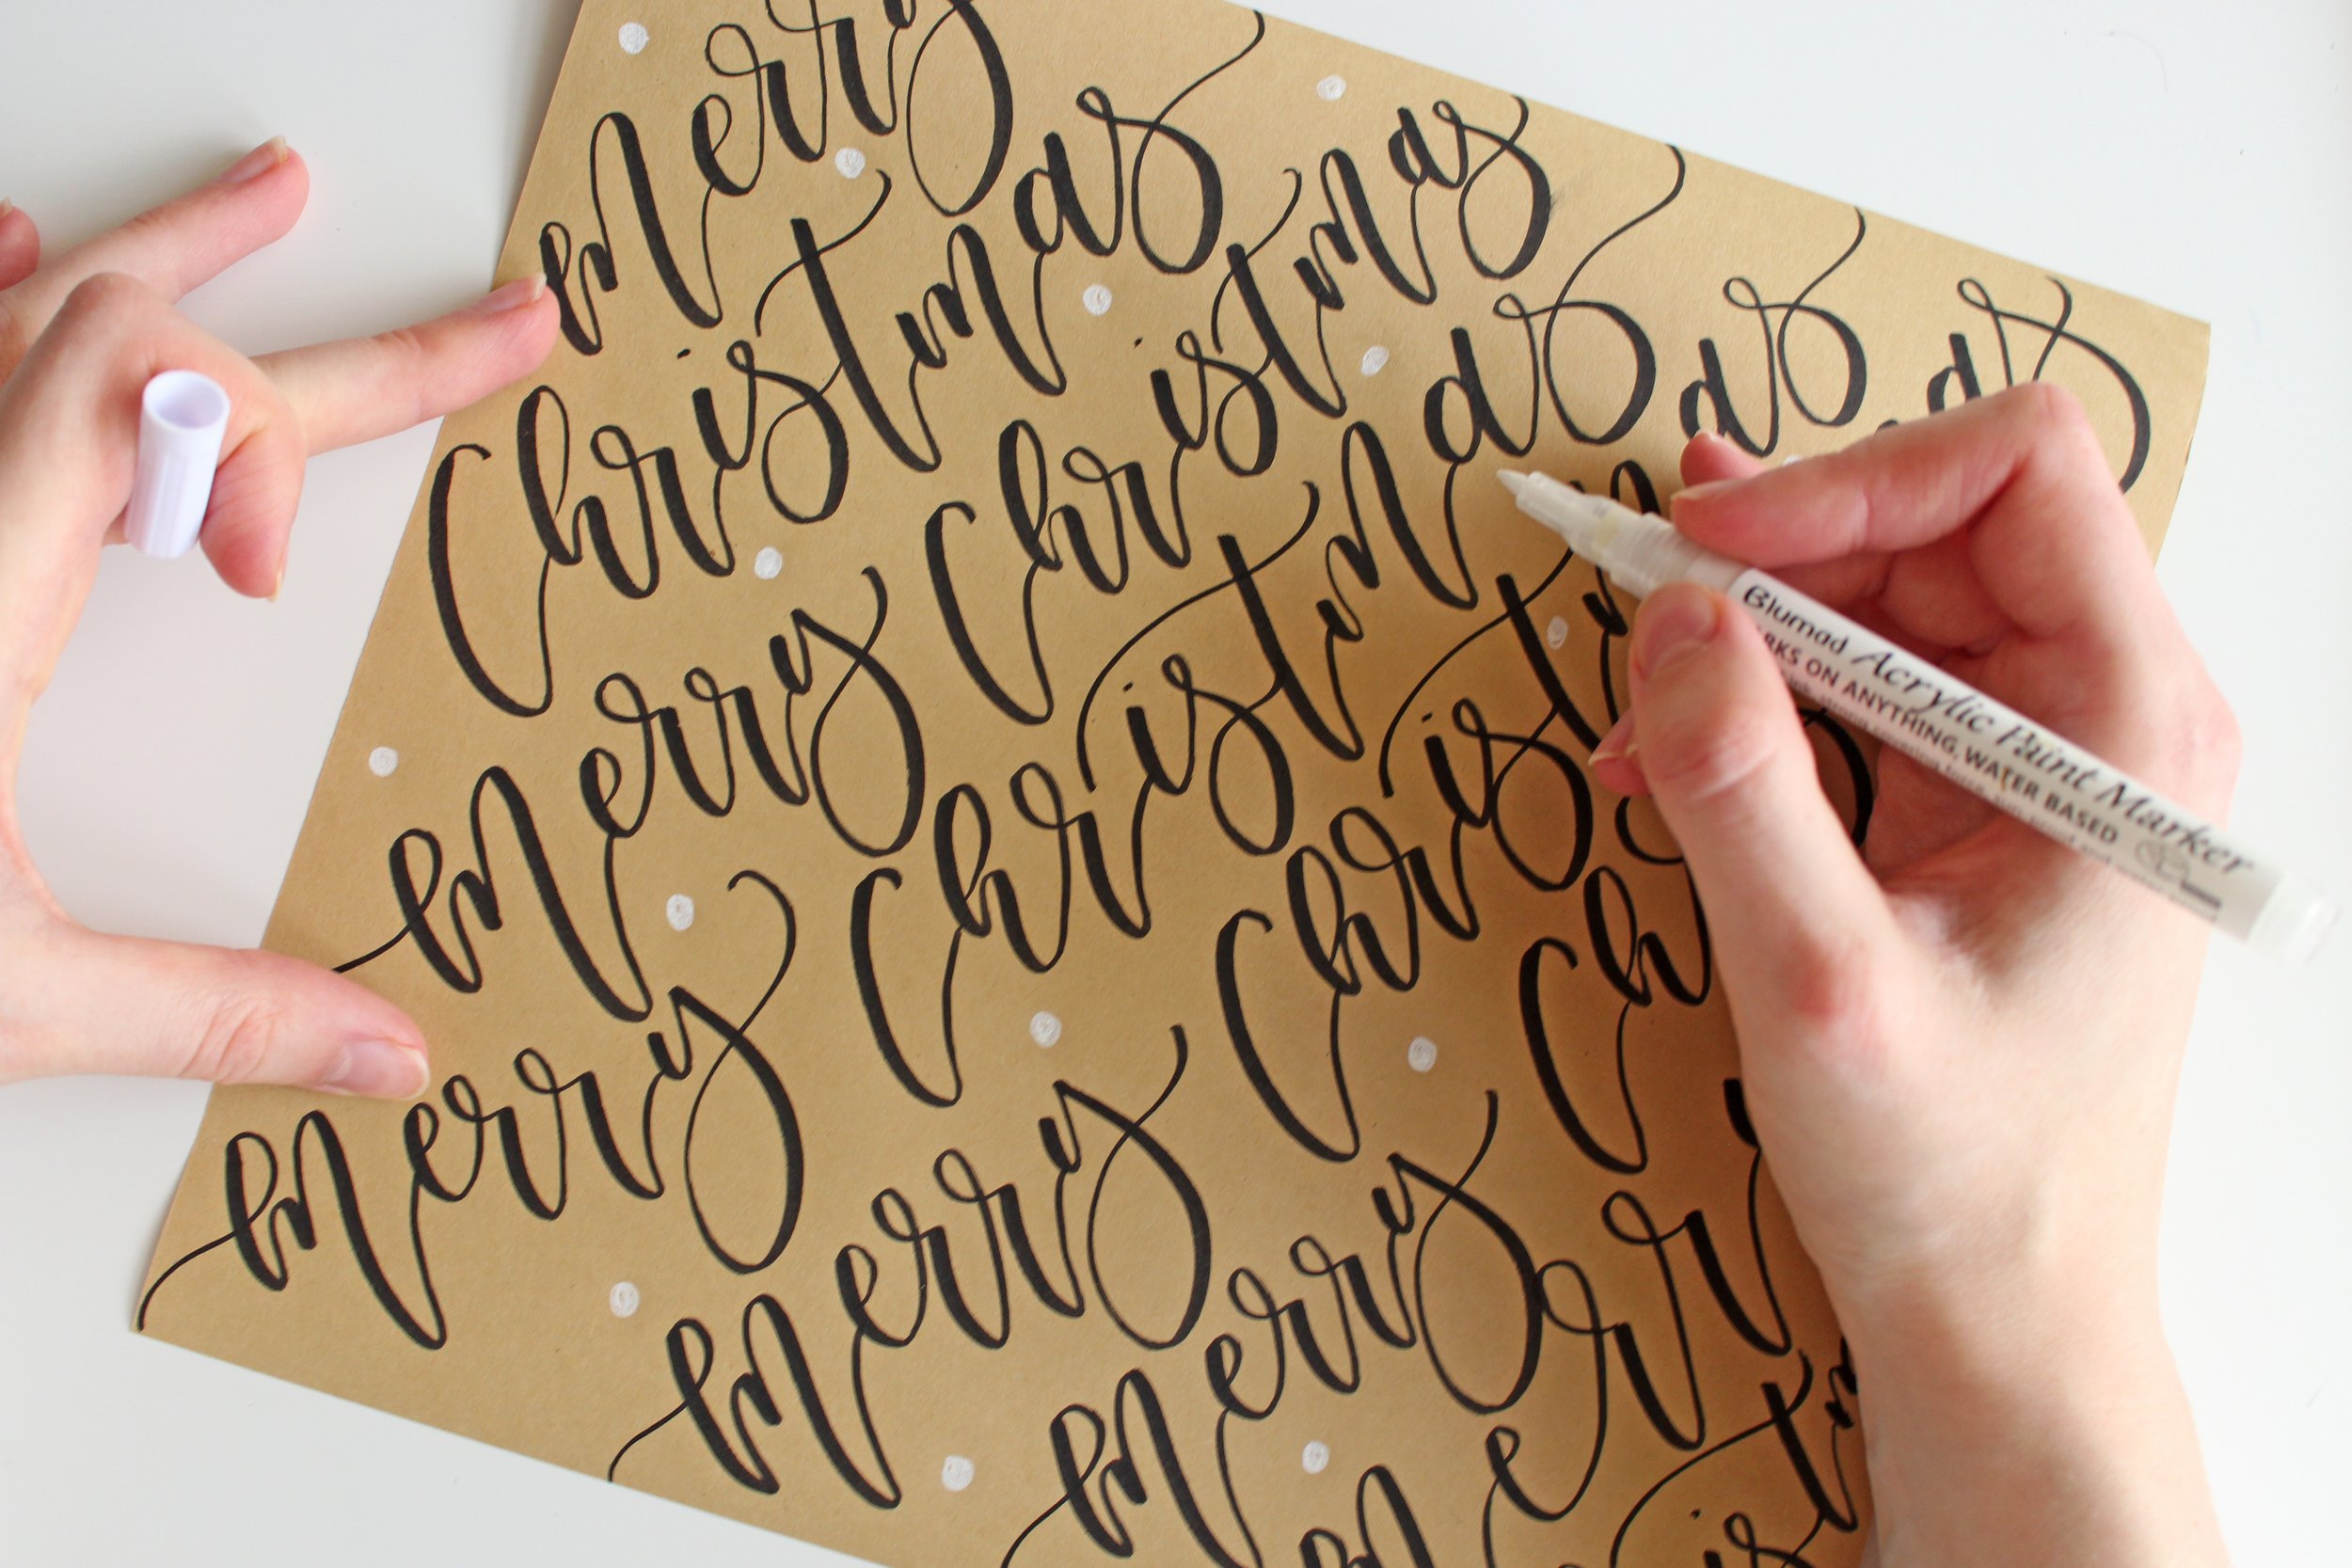
Step 4 - Use your acrylic pens to add some simple fun background designs. White dots can look like snow, or golden snowflakes can add a bit of shine. Try combining red and green for a classic Holly Berry design. Rotate your wrapping sheet as you add in drawings and try to focus on blank spaces where you have a bit of a gap between lines or words.
Get creative!
Hope you enjoy this project! Combine your gift wrap with hand lettered gift tags and a rustic kraft twine!
If you feel like you would like to practice your lettering skills a little bit more beforehand, join me for one of my festive online lettering classes this season!
I would love to see your projects on Instagram or in our facebook group!
Let's connect: Instagram: http://instagram.com/creativefeeldesigns
E-mail: hello@creativefeeldesigns.com
www.creativefeeldesigns.com Music: @epidemicsound